How to Home-Process the LomoChrome Purple Film: Tipster by Éléonore Garnier
2 20 Share TweetÉléonore Garnier started taking up photography more than 10 years ago with the La Sardina. She mainly takes her pictures in Eastern Europe and Caucasus. Éléonore learned everything by herself, even processing and developing films! On the occasion of Film Month, the photographer shares with us how she processes her own rolls of LomoChrome Purple film at home with his comprehensive and detailed guide.


Processing films at home can sound daunting at first, especially in color, and even more with special films like the LomoChrome Purple from Lomography. I chose to share with you my easy-going method to develop your most wonderful purple tints. This will also be a nice occasion to deconstruct some myths regarding color film processing.
First myth: No, the LomoChrome Purple doesn't need any "special" development. It can be processed like any color negative films in C41. There are many C41 kits on the market, more or less complicated with different numbers of baths and very precise indications of temperatures for processing that can frighten some people. I chose a very simple process with only two baths, with chemistry in powder to dissolve. It's nearly effortless for beginners.
Second myth: Can I develop the LomoChrome Purple with another type of color negative film without taking any risk? Yes, absolutely! And here's the demonstration since the Purple roll I developed in this tutorial took its bath with a "classic" color film shot at 200 ISO (I also shot the LomoChrome Purple at 200 ISO). It did not have any impact on the two films.
Materials Needed:
- A LomoChrome Purple.
- Scissors to cut the film from its canister.
- A developing tank and reels for winding the film.
- A thermometer to control the temperature of your chemistry.
- C41 solution: a developer bath and a blix bath (bleach+fix).
- A sink to keep your solutions at a warm temperature and to rinse the processed film.
- A timer, to control the time of each bath.
- Pegs to hang your film for drying once processed.
- I advise using a special film squeegee to drain the film and prepare it for drying.

It's Bath Time!

In order to activate the chemistry, they have to be at 38-39° temperature. So, before anything else, you have to place the bottles with your solutions in a bath, ideally in a bucket or a sink, at the temperature indicated in order for them to get warmer and ready for when you will be done preparing your developing tank.
Don't panic if the solutions are not exactly at 39,00° when you start processing: if the temperature is slightly low of one or two degrees, you just need to extend the time of 30 seconds or one minute.
Go In the Dark

Once you put your solutions in the bath, it's now time for a more delicate step because it has to be done in complete darkness. I recently acquired a light-tight changing bag so I can do this step anywhere, it's very convenient. So, in complete darkness, you have to open your film canister and transfer the film on the reel, then put it in the developing tank. There are different ways to open a canister, some manage to retrieve the film leader to get it out, some open the canister from the top with a bottle opener.
Usually, I quickly lose patience and I open the canister on the lateral side by twisting the smooth part of the canister. This is not a very orthodox procedure, but it has the advantage to create a lateral opening that helps me to transfer the film from the canister directly on the reel without almost not touching the film during this step.
Once the canister is open, you have to cut the film leader with a scissor, if possible in a nice round shape that will help you to insert the film in the reel. And this still has to be done in complete darkness. This part of the film is usually "burnt" so you have the right to make several tries to cut on a few centimeters without any problem. On the other hand, to cut the film at this end, where it's attached to the canister, you have to cut as close as you can to the canister since you have photos until the end on this side of the film.

To wound the film on the reel, you have to place the two sides of the reel in front of each other when you align the two triangle-shaped notches in which you will insert your film. Slightly bend the film with your fingertips to help you inserting the film on a few centimeters until it gets to the two balls that will allow you to move the two-reel sides without touching the film until you wind it. It's not an easy step, that's why you always get a film for training when you buy a new tank and reel so you can get used to doing it in daylight before doing it in complete darkness.
I want to also take this opportunity to deconstruct another myth: no need to use gloves at this point, just make sure your hands are clean and be careful to not have cream or anything oily on your skin before touching the film.

Once the film is on the reel, place it in the tank and close the tank with the lid and make sure it's closed and secure, the "click" tells you it's safely closed. You can now turn the light on.
Develop and Fix
Developing: Check if the baths are at the right temperature before pouring them into the tank. You will first pour the developer and leave it in the tank for 3 to 5 minutes. The time depends on the product you use and on the "purity" of your solutions, that is to say, the number of times you used your developer. Some people only use their solution once, personally, I use the same developer more than ten times and I increase the time each time to compensate for the concentration reduction due to the multiple uses. The outcome is always great. Prepare your timer when you pour the developer into the tank, close the tank with the second lid to avoid splashes. During the first minute, slowly stir both in horizontal and vertical directions to make sure that the chemistry is well dispersed all over the film. After one minute, leave it to work. I advise you to tap the tank on a table to make disappear the bubbles that can form on the surface and that could smudge your films, unless you are looking for a "film soup" effect, of course. You then will have to stir once again the same way for 10 seconds every minute.


Fixing: When the first bath is done, you have to stop and fix the development with the "blix". Transfer the developer in its initial container and immediately pour the blix into the tank. The blix also has to be at the right temperature. Repeat the previous step (stirring the first minute, then ten seconds every minute) and respect the time indicated by the manufacturers. In my case, it's 8 minutes. The blix creates a chemical reaction, the lid gets a bit rounded from the very first minute. Don't hesitate to release the air out between two stirrings as you would do to take the air out of a Tupperware. It will avoid a leak of the product from the tank when you are stirring and avoid staining your clothes.


Rinsing: Once the fixing time is up, you have to rinse the film and the tank. Use a lot of clear and lukewarm water to make sure there's no trace of blix left on your film. You now have finished developing your film and you can see your images on the reel!


Admire and Dry!
It might be the most satisfying moment of the process. You can now unroll your film from the reel and attach it vertically to let it dry. Ideally, choose a slightly moist place with a constant temperature like a bathroom. You can use pegs to attach your film to a wire. Make sure to weigh your film at the bottom with other pegs so it can dry very still. No need to use gloves for this step but avoid touching the negative surface. You have to scrape the film to avoid water droplets on it. I personally use a special film squeegee but there are other techniques. Let dry for several hours, and you can admire your hanging pictures.


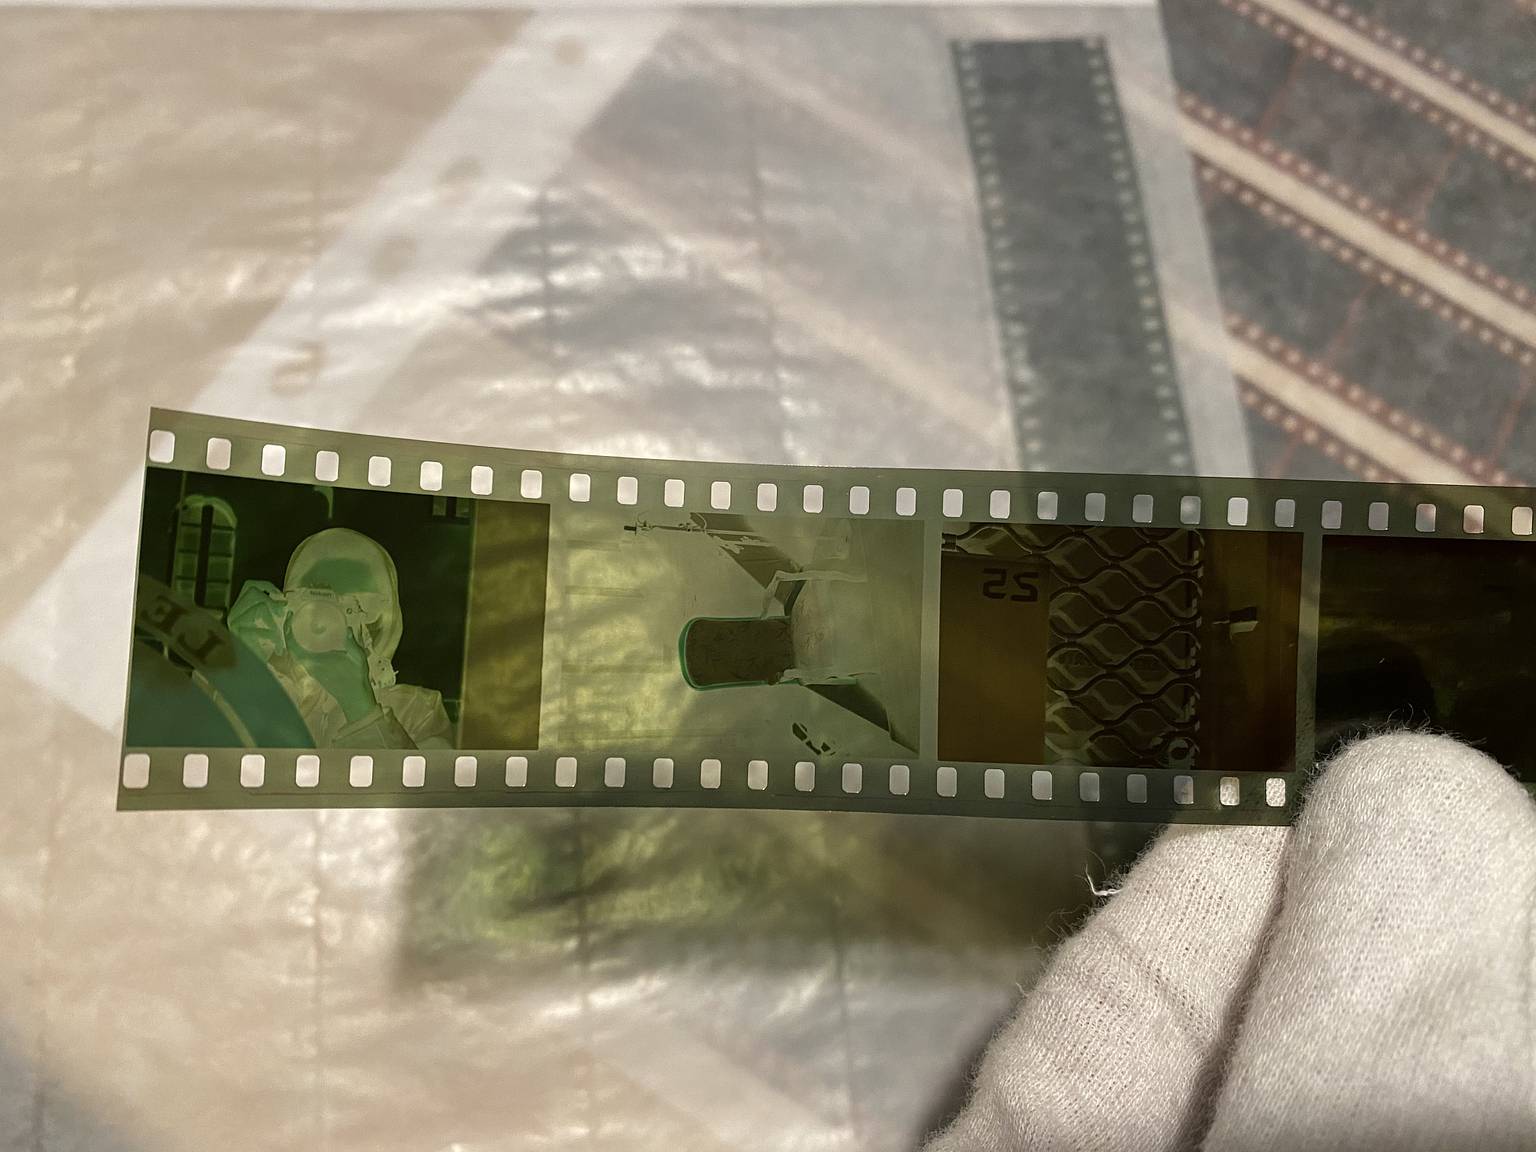
The Art of Scanning
I then digitize my photos with a flatbed scanner. For this step, you have to use cotton gloves to avoid finger marks. My scanner takes strips of 6 photos in 35 mm so I cut my negatives in strips of 6 photos. The most important thing for this step is to clean the scanner glass to minimize dust with a bellow before and between each use. This will help you to remove the dust that could get stuck on your film or on the scanner glass.


Some purists consider that it's sacrilegious to digitally edit your photos, that it's against the spirit of analogue photography. In reality, when you do analogue prints, it is an interpretation of the negative and human decisions that come into play regarding colors or contrasts. Sometimes people use ink or masks to retrieve some lost pieces of information. It's basically an analogue Lightroom.
I edit my scans in Lightroom to remove eventual specks of dust and to also change the exposure as I have the tendency to do lighter scans to get as much info as I can in the shadow. Analogue is the opposite of digital on this point, it's more difficult to retrieve details in the shadows than in the whites. I don't touch anything else when I like the results but you are free to play with the tints, the LomoChrome Purple always offers surprising results when you play with the picture calibration. Play with the unique atmospheres brought to you by the LomoChrome Purple.


A big thanks to Éléonore for taking the time to share her advice for processing the LomoChrome Purple at home. Don't hesitate to follow the photographer on Instagram!
2021-04-26 #tutorials #lomochrome-purple #eleonore-garnier


2 Comments