Extreme Multiple Exposure Photography by Ian Turnage-Butterbaugh
3 18 Share TweetMaking multiple exposures has always been a big part of the creative process of many Lomographers. Ian Turnage-Butterbaugh (revisionistphotography) takes it to the next level by shooting the same object on 1 or even more full rolls. Coining this technique film sketching, his work is indeed reminiscent of architectural sketches made with a pencil, as well as impressionist paintings from the 19th century when he uses color film. We talked to Ian to find out more about his process, how he has developed this unique style of photography, and got some tips on how to get started with the technique.

Hi Ian, please introduce yourself and tell us how you got started with film photography.
Hi! My name is Ian Turnage-Butterbaugh and I’m a self-taught medium-format film photographer based in Northfield, Minnesota. I come from a line of amateur photographers on my father’s side, so it was through them that I got into photography in the 1980s. Growing up, we had a darkroom in the house and I always had a camera or two, but like most people, I made the switch to digital cameras in the early 2000s. It wasn’t until 2020 that I returned to the art and joy of analogue photography.
Before 2020, I had been focusing on digital multiple exposure photography for a few years, inspired by the work of Pep Ventosa. I fell in love with the creative process involved in multiple exposure photography and how it can transform a scene. However, I quickly became disillusioned by the amount of time I was spending behind a computer screen post-processing images in Photoshop, rather than in the field behind the lens. I felt disconnected from my art and from the subjects I was photographing, so I began seeking a way to create these types of photographs with more intentionality where I could be present in the creative process and fully engaged with my surroundings.
Inspired by the analogue black and white, multiple exposure work of Frank Machalowski, I bought two film cameras, built a makeshift darkroom, and development lab in the basement of the house my wife and I were renting, taught myself to process and scan film, and set out to recreate my digital work on film. Over the last couple of years, I’ve completely abandoned digital photography and have been fully (possibly obsessively) focused on testing various film stocks, pushing boundaries, experimenting with lighting, and tweaking development processes to extend extreme multiple exposure photography (or what I call EMX Photography) beyond black and white film and achieve the colorful aesthetic results I’ve desired.
What cameras and film stocks do you mainly use and what is your go-to setup?
The camera I use for this project has evolved over time. Originally, I started with a Nikon F4S but quickly switched to a Mamiya 645 1000S, due to the convenience of its multiple exposure switch and the manual controls the PDS prism finder offers, plus it feels bomb-proof. It’s a reliable workhorse that doesn’t require a battery and has never let me down. Since my Revisionist Photography project now includes both black and white and color films, I’ve upgraded to a Mamiya 645 PRO, solely for its interchangeable film backs. Now, I can photograph an object with a black and white film, switch out the film back, and photograph the same object with color film. The only downside to my current setup is that the Mamiya 645 PRO requires several batteries, which will ruin your day if you don’t plan ahead and have spares on hand.
The film stock I use depends on the effect I’m trying to create and the series for which I’m photographing, and is influenced by the environment and weather.


If I’m working on my “Film Sketches” series, I’ve found that two black and white film stocks work the best: (1) Ilford’s Delta 100 and (2) The Film Photography Project’s Wolfman. Both have a low ASA, an exceptionally wide exposure latitude, a fine grain that captures detail across exposures, and they seem relatively resistant to reciprocity failure. I’ve had success with more than 100 exposures on a single frame with both of these film stocks and, to this day, I keep a roll of one of them with me at all times.
For my “(F)i(l)mpressions” series, I use both C-41 and slide film. I’ve only had marginal success with C-41 film but have found that Kodak’s Ektar 100 seems the most amenable to this technique and produces very soft, under-saturated painterly photographs. If I am hoping for richer tones and brighter hues, while still capturing detail and contrast, I tend to shoot with Kodak Ektachrome E100 film. Slide film is difficult to use with this technique and is time-consuming to process, but the vibrancy of the photographs makes it well worth the time and effort. For that reason, I use this film exclusively for my “Paint by Exposures” series, too.
Finally, I always have a pocket notebook and a pencil with me so I can take notes about my process. If I take enough notes and consider them when my photographs are processed, there is always something new to learn, something to improve upon with the next roll of film.


How would you describe your style of photography?
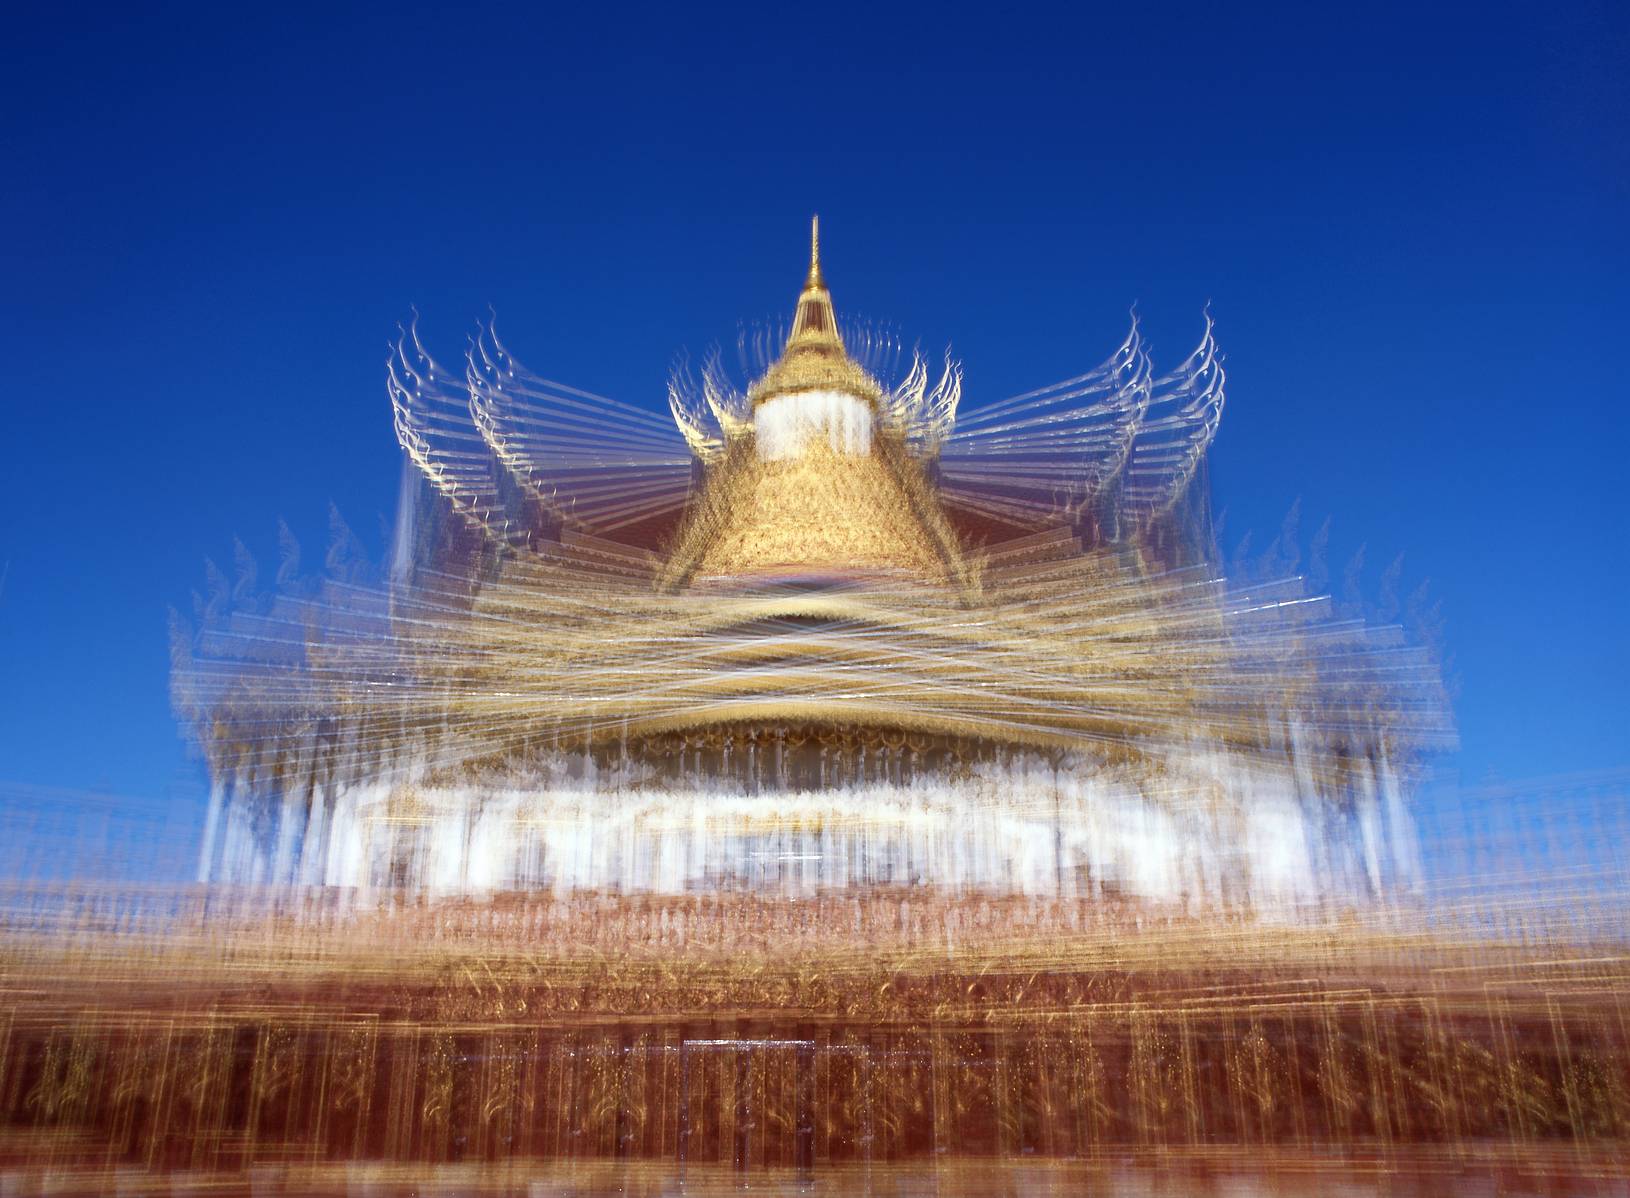
My original goal with Revisionist Photography was to create color photographs that resembled impressionist paintings. As such, I occasionally describe myself as an impressionist photographer. However, I think it’s more accurate to describe my style of photography as film-based photographic art. Regardless of whether it’s black and white or color, my art involves the manipulation of film, both while in the camera and while in the darkroom, so it can tolerate extreme multiple exposures and produce results that appear to be an ambiguous medium at the intersection of photography and painting or sketching.
Can you tell us about your first “photo sketch” and how it eventually became a series?
My first “Photo Sketch” was taken on December 30, 2020, just a few days after my wife got me a Nikon F4S for Christmas, and was photographed on Ilford FP4+ film. I am fortunate to live near the Twin Cities in Minnesota, where there is an abundance of beautiful architecture to photograph, and shot my first experimental roll at the Como Conservatory, Cathedral of St. Paul, and Minnesota State Capitol Building. This was also the first roll of film I processed myself and, of the 36 exposures on the roll, a few turned out marginally well. I believe all of them were less than 10 exposures per frame, but I remember running upstairs from my basement darkroom and yelling, “It actually worked!” From that first roll, I was hooked, and I was determined to master the technique.
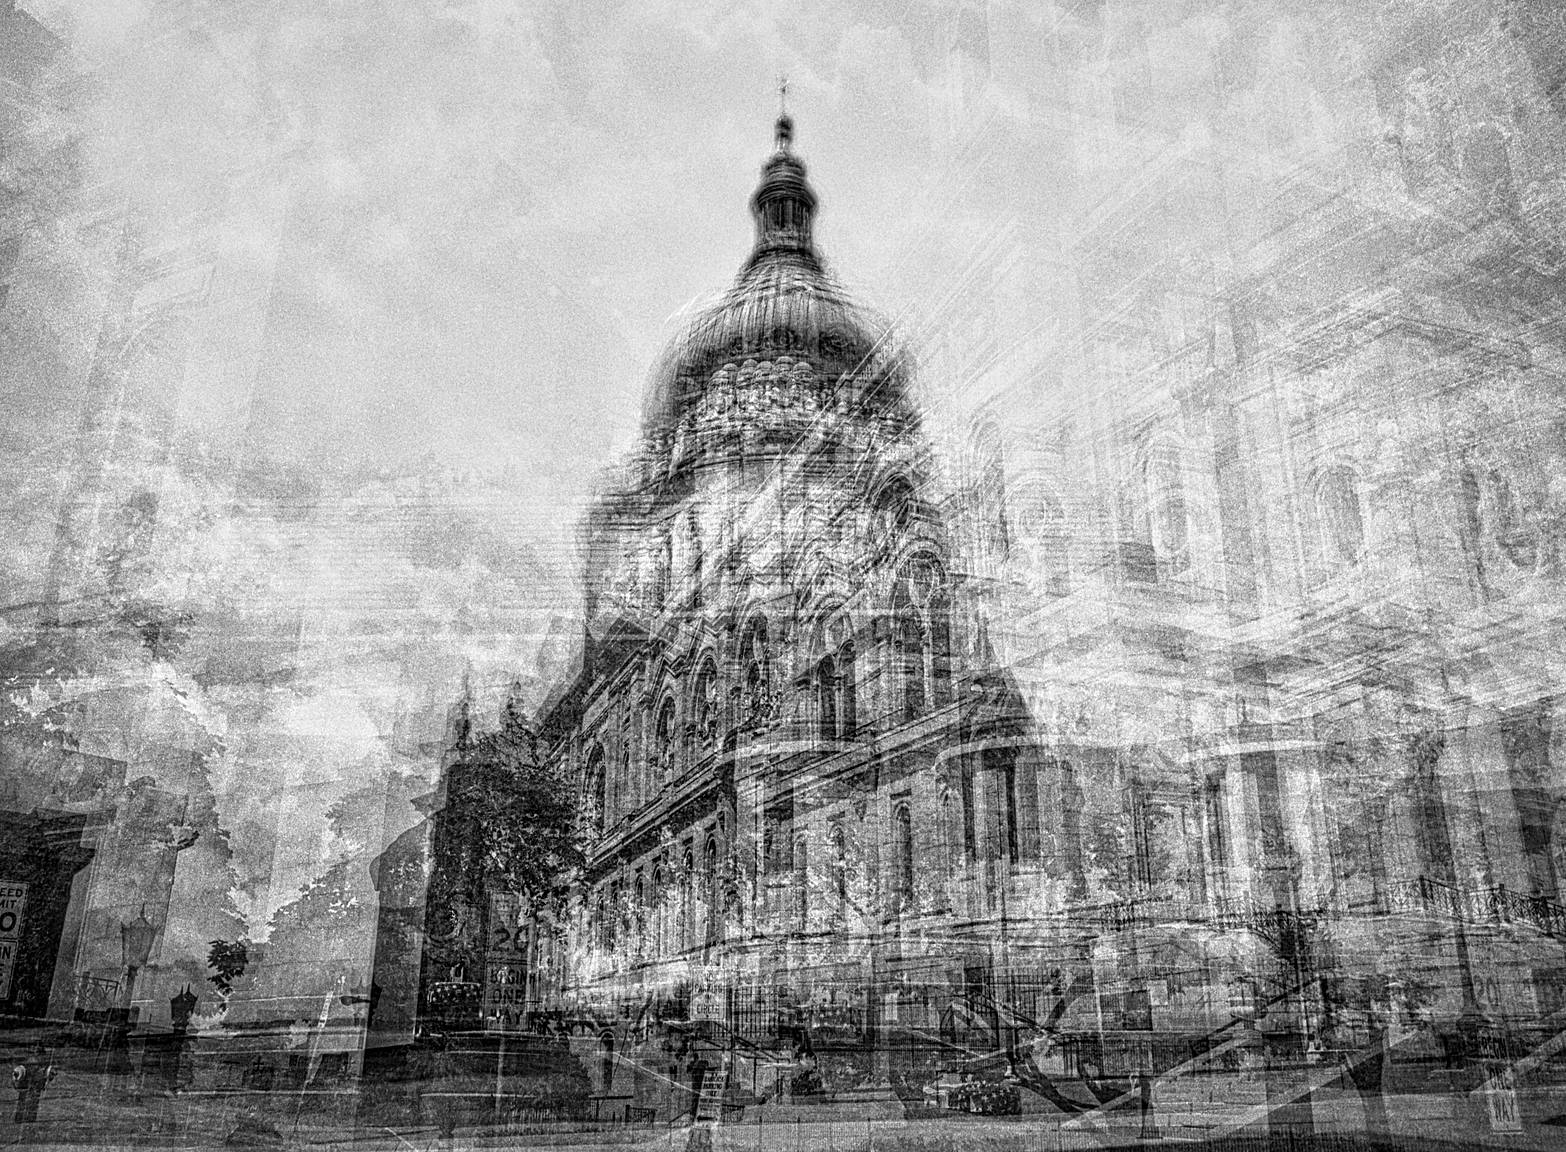
The year-long black-and-white experimental process served as a study of architectural design and detail that I eventually used as a template for experimentation on color film. However, throughout that first year, I was able to refine a technique that resulted in photographs resembling architectural drawings and hand sketches, where certain details are accentuated and others are distorted. The “gist” of the central object is evident, but the peripheral details are left to the imagination. I’m drawn to this effect and have expanded the series to include color “sketches,” which I continue to work on to this day.


Is there any building or still life object which is your dream “photo sketch”?
I really enjoy experimenting with buildings and objects anywhere I travel, but I spent some time in Japan in 2018, and wish I had been working on this project at that time. There are so many amazing architectural designs in Kyoto and Tokyo that have distinct lines and angles, which I think would work well for my “Photo Sketch” series. That being said, part of the fun with this project is researching the towns and cities I visit and discovering something I wouldn’t have noticed otherwise. Sometimes it’s a street with decorative lamp posts, other times it’s a municipal building, still others it’s a public library or parking lot. But no matter what, it’s an opportunity to photograph something uniquely and present it from a different perspective. My dream is really to continue this project as long as I can, whereever life takes me, and to always find something new in the process.
You have two other series that use multiple exposures as well. Can you tell us a bit about these?
My “(F)i(l)mpressions” series is a collection of extreme multiple exposure photographs of trees on film that have some of the transformative qualities that characterize the impressionist art movement and are made with some of the techniques impressionist painters used. That is, the photographs in this series are made by utilizing bright colors, changing light, the passage of time, movement, and multiple angles, all on a single frame of film. The result is an unconventional composition that offers a subjective alternative to the traditional photograph: soft details, accentuated colors, distorted perspectives, and playful light and shadows, creating an impression of nature, rather than an exact representation.
To get the lighting right for each photograph, all of the exposures may be taken in a relatively short period (5 – 10 minutes) or I might take half of the exposures in the morning and the other half in the afternoon. Much like plein air painters, photographing the same object across time allows me to incorporate into my photographs the way the landscape changes in variable lighting and weather conditions.


My “Paint by Exposures” series is my newest project and is comprised of photographs that extend the painterly characteristics of my “(F)i(l)mpressions” series to inanimate objects. The same techniques are used for photographs in this series, however they are only made on slide film.
The use of slide film allows for exceptional color and detail retention across multiple exposures, which softens harsh angles and obscures architectural details, leaving the “essence” of an object and resulting in an image that looks much more like a painting than a photograph. Hence the name, “Paint by Exposures,” which is an homage to one of my favorite childhood pastimes – Paint by Number – and more accurately describes the purpose, process, and result of this form of photographic art. This series is young, so I’m excited to see how it evolves in the next year or so.


For anyone wanting to try this style of photography, what do they have to know to get started?
To get started, I’d recommend a good familiarity with some film exposure basics, including ASA/ISO and when and how to push and pull film, both while exposing the film and while processing it. Exposing film correctly across tens of exposures requires constant adjustment based on lighting conditions that can change drastically from exposure to exposure. Knowing what settings need to be adjusted in order to compensate for more or less light is essential. If interested in learning more about getting started with this technique, I offer two photography courses on my Revisionist Photography website.
Aside from that, being hyper-aware of your surroundings and attentive to the peripheral details is helpful. Before each exposure, I like to examine the entire frame to select angles that add complexity or uniformity (depending on the desired result), avoid distracting elements and reflections, and include or exclude colors (again, depending on the desired result). Not only will this aid in the success of your photographs, but you’ll find yourself noticing things that generally are at the fringes of our awareness, resulting in a greater appreciation of the environment around you.
Finally, you’ll definitely need patience and poise. Experimentation and pushing the perceived limits of photographic film are challenging and definitely don’t always work out. Be patient with yourself, have fun and learn from the inevitable failures. Also, a lot of the work I do requires precision, stability, and balance to align objects correctly. In situations where I use a tripod, I use a Platypod Platyball Elite ball head. When I shoot handheld, I practice breathing techniques to remain calm and steady.
Which was the hardest photograph for you to make, and do you have any stories about things not turning out how you wanted?
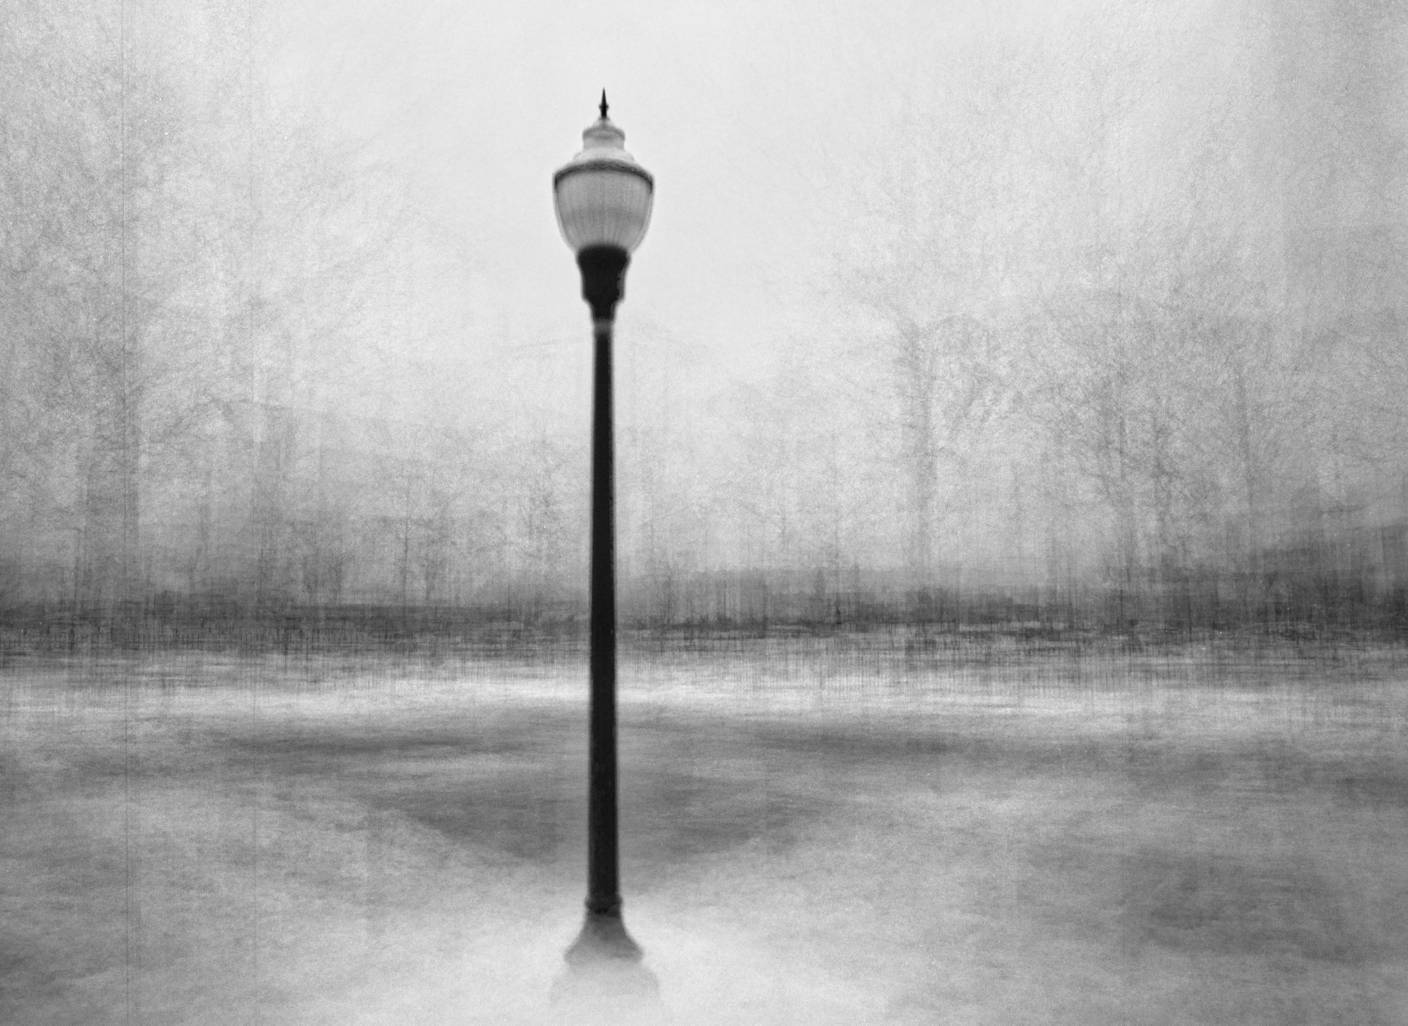
The most difficult photograph to make was, without a doubt, Film Sketch 38, which is made of 101 exposures of lamp posts on the campus of the University of Minnesota Twin Cities. Aside from it being brutally cold during January in Minnesota, getting lamp posts aligned in all 101 exposures and ensuring the photograph wasn’t over-exposed was painstakingly time-consuming and difficult. There is no way to fix alignment in post, so you can’t make any mistakes. One misalignment and the whole photograph is ruined. After a few hours of carefully walking, framing, aligning, metering, and note-taking, I ended up with a photograph with haunting details and deceptive depth. It’s one of my favorites!
I have too many stories to tell about the process not turning out how I wanted it to but the most salient was probably during a trip to San Diego, California in 2022. That was the first time I experimented with C-41 and slide film in that part of the world and I didn’t realize how different the intensity of the sun is in southern California than it is in Minnesota. As a result, I didn’t make the appropriate exposure adjustments and nearly every roll I went through was too over-exposed to use. Fortunately, I was able to go back to southern California later in the year and was able to try again, with more success the second time around.
Even when things go right in the field, I’ve made some major mistakes while processing film in my home development lab. When I first started, I took my iPhone and Apple Watch into the darkroom with me not realizing the effect light from my phone during an unexpected call would have on the film. After I started experimenting with C-41 film, I once accidentally processed a batch with my black and white developer, rendering the rolls unusable. These are just two examples of many mistakes, but just know that, no matter how careful you are, you’re bound to make mistakes and end up with less-than-desirable results.
Can you share with us your favorite photos from your "film sketches" series?
My three favorite photographs are: Film Sketch 29, Film Sketch 44, and Slide Film Sketch 7.


Film Sketch 29 is a photograph comprised of 15 exposures of 15 different lamp posts in Chinatown, San Francisco, CA. The beautifully ornate lamp post is in focus in the center of the photograph, surrounded by the peripheral details of the bustling and chaotic Chinatown sidewalks. The way the architectural details, pedestrians, and vehicles all blend to distort the composure can be overwhelming, not unlike the actual experience of visiting Chinatown.
Film Sketch 44 is a photograph comprised of 17 exposures of the Wisconsin State Capitol Building, from 17 different angles. The dome of the building retains much of its detail, yet the rest of the building is blurred and distorted in a way that reminds me of an architectural sketch. I also intentionally shot through the trees surrounding the building, so the scale is somewhat obscured and the tree limbs softly frame the building.
Slide Film Sketch 7 demonstrates the evolution of this series from black and white to color and is one of my favorites, to date. It is comprised of 21 exposures of 21 different lamp posts decorated for the holidays at Irving Park in Saint Paul, MN. I love how realistic and crisp the lantern turned out, while the rest of the lamp and the background are softer and dream-like, almost magical. It doesn’t look real and, to me, it evokes a lot of wonder and joy.
Are there any lessons you want to share with the Lomography community?
I’ve learned so many lessons throughout the course of this project but the most important ones always came from the biggest failures. So, I’d just encourage others to experiment with intentionality and fail with curiosity. Take risks and push boundaries, but learn and adjust along the way.
Also, reach out and say hi! I love meeting and chatting with others who are into film photography and I’m happy to share more about my experience with this project and the technique I’ve developed.
We thank Ian for showing us his amazing work and for giving us tips on how to start. For more of Ian's work make sure to check out his Instagram and Website.
written by rocket_fries0036 on 2023-02-16 #gear #people #tutorials #street #medium-format #black-and-white #experimental #long-exposure #multiple-exposure #minnesota #architecture #usa #sketching


3 Comments